A clipping path service removes the main object from a photo. It makes the edges neat and sharp. You can then put the object on any background you like. This is why many brands and photographers use it. It helps photos look clean and professional.
Professional clipping path services use the Photoshop Pen Tool. This tool lets the editor trace every curve carefully. They zoom in, draw smooth lines, and keep edges perfect. This work takes skill, focus, and a steady hand. That’s why expert editors do a better job than fast, automated tools. Many people choose affordable online clipping path services. You just upload your photos. Then a trained editor fixes them and sends back clean, ready-to-use images.
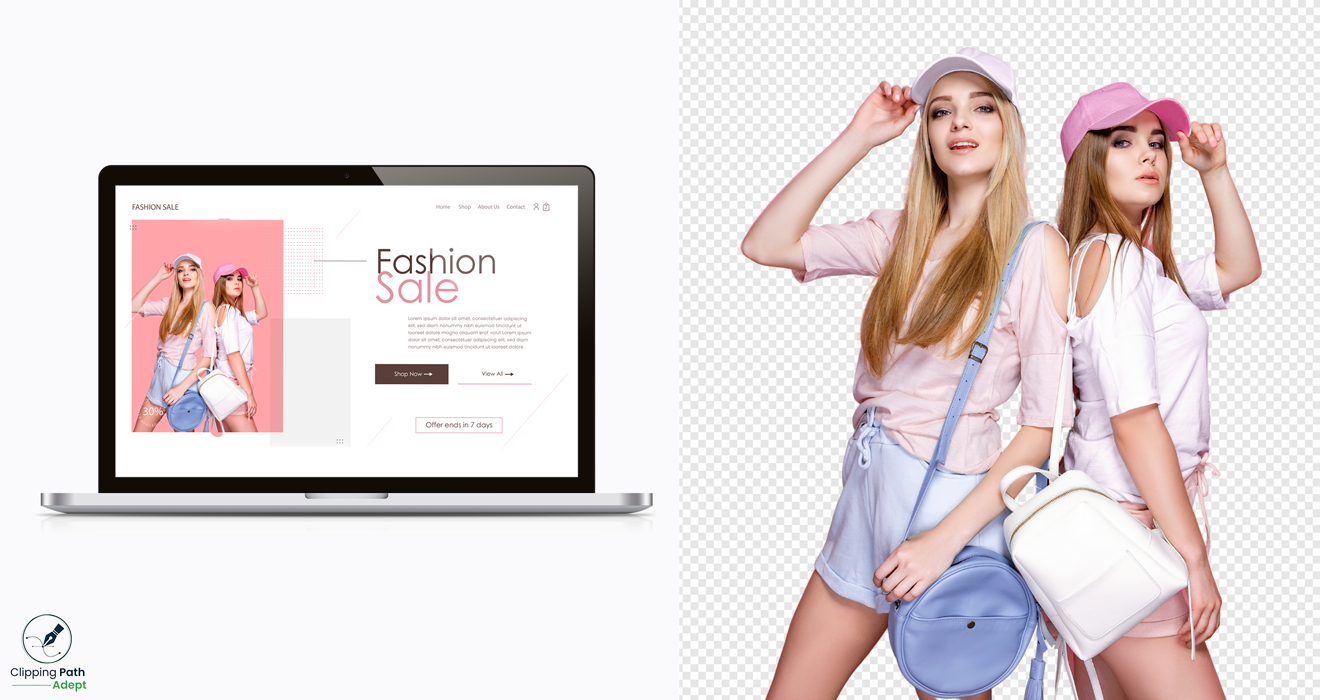
Clipping Path Adept is one of the top providers. They work with product photos, fashion shots, jewelry, furniture, and more. Their team delivers precise edges, fast work, and consistent quality. Each image looks clear, sharp, and ready for online stores, ads, or catalogs. They focus on giving real value with strong quality at a fair price.
If you want the best clipping path service online, Clipping Path Adept offers expert work that makes your business look professional. This blog will walk you through every step of the clipping path process and what to expect from the best clipping path provider.
What is a Clipping Path Service, and why is it important?
The clipping path service process removes objects from the image and makes them more visible. This separates the object from the background. This is especially useful for product design, online stores, e-commerce, or anywhere else you want your images to look crisp and elegant. A professional clipping path service makes your images look cleaner and easier to work with.
Understanding of Clipping Path
A clipping path is a line drawn around an object using the Photoshop Pen Tool. The editor sets points around the shape. These points connect to form a smooth, perfect path. The more accurate the path, the cleaner the cutout looks.
This process is better than instant selection tools or automatic cuts. It gives full control over every curve and edge. So, it is perfectly used for equipment, costumes, jewelry, and everything else that needs sharp detail.
Clipping paths is not just about basic editing. It also helps with technical tasks such as masking and background adjustments. When done correctly, the object and background stay separate.
This makes it easy to place the item on white, transparent, or custom backgrounds for eCommerce images. A professional clipping path will make your photos look simple, realistic, and professional.
Classification of Clipping Path
Not every image object is the same, so distribution methods vary. A professional editor chooses the right format to keep things clear and simple.
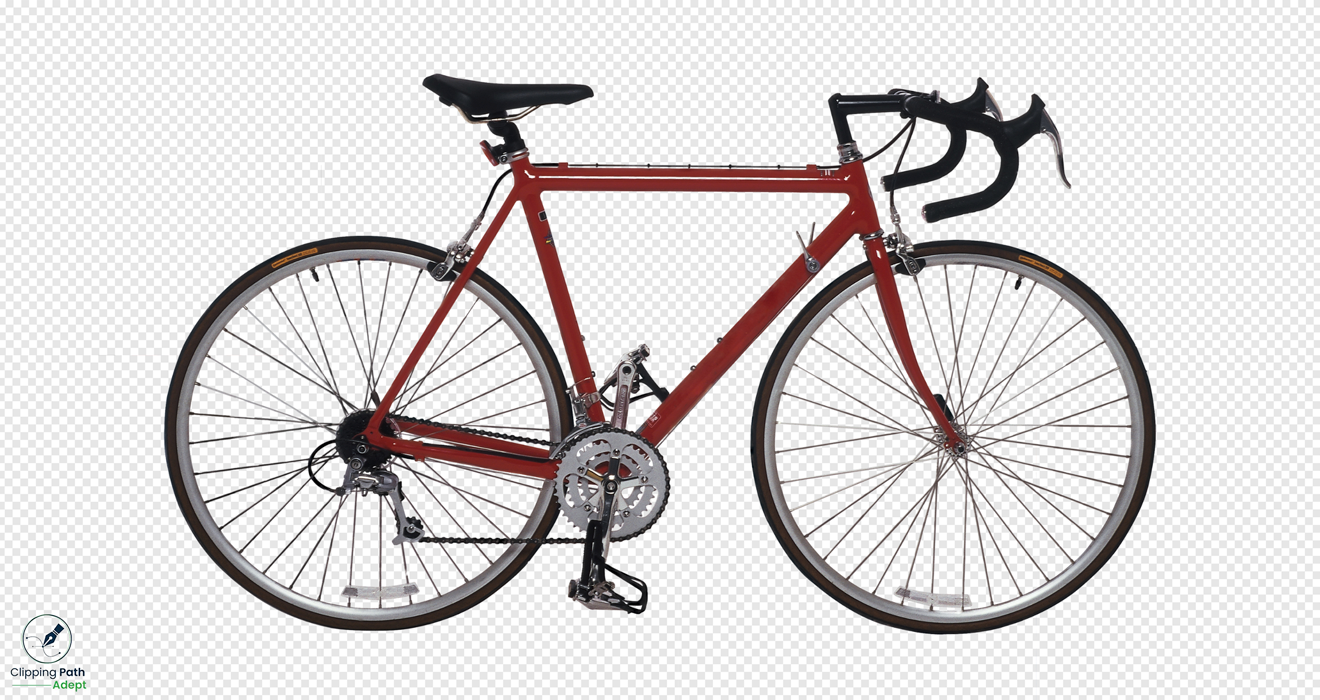
- Basic Clipping Path: This is used for simple shapes. Objects with straight lines or soft curves work well. Boxes, bottles, and phones are examples.
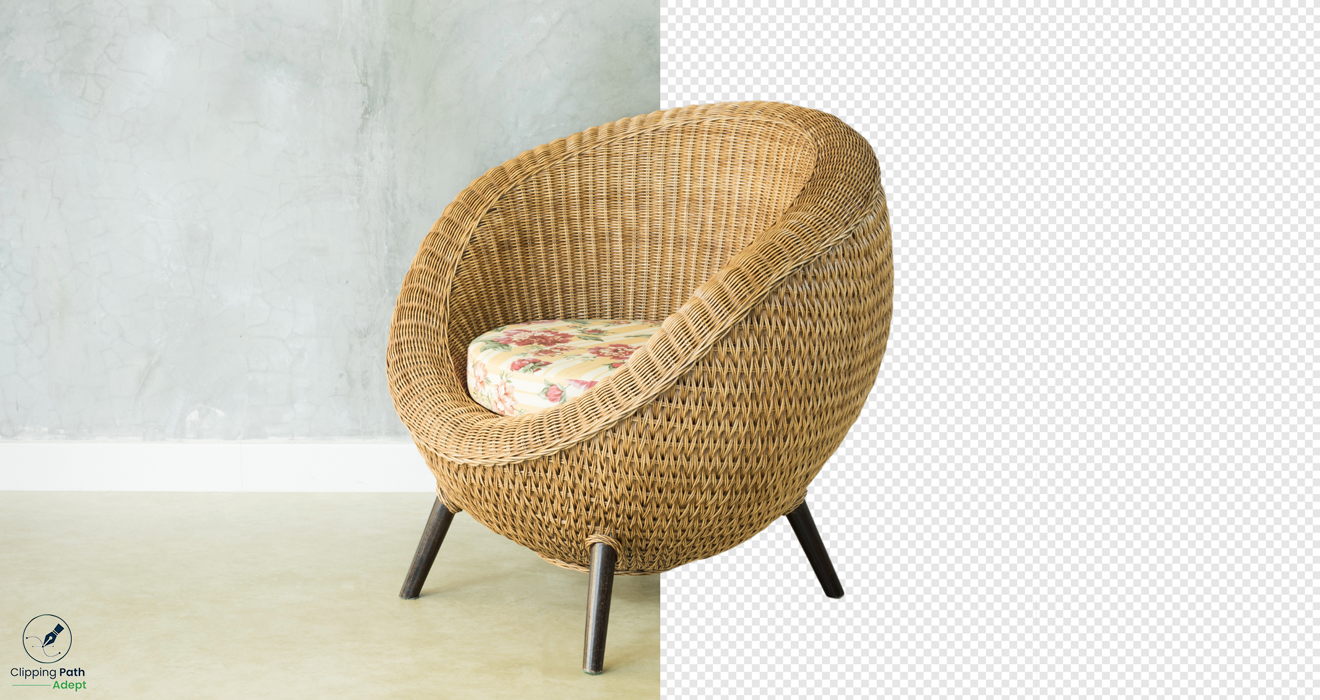
- Compound Clipping Path: This is for objects with more curves or mixed shapes. Bags, shirts, and furniture often need this. Editors add extra points to follow the shape accurately.
- Complex Clipping Path: Used for objects with holes, cutouts, or detailed curves. Shoes, seats, and car parts fall into this category.
- Super Complex Clipping Path: For products with tiny details. Jewelry, necklaces, wires, and accessories with small or delicate edges need this type.
- Multiple Clipping Path: This is used when different parts of the same object need to be partitioned.
Each part gets its own path. You can change colors, shadows, textures, or brightness for each section. It’s perfect for clothing, product sets, and detailed images.
Each type of clipping path has a different level of difficulty. A trained editor chooses the right one so your final image looks clean, sharp, and ready for any background.
Key Applications of Clipping Path Services
Clipping path services are used in many industries to make images clean, sharp, and professional.
- E-commerce businesses use them to separate products from backgrounds. This makes items stand out in catalogs, online stores, and marketplaces.
- Fashion brands use clipping paths to show clothes, accessories, and jewelry clearly. The edges are precise, and the details look realistic. This makes products look more appealing.
- Marketing and advertising agencies rely on clipping paths for banners, campaigns, and promotional content. The visuals look striking and professional.
- Photographers and studios use them for portfolios, photo books, and client galleries. Every image looks flawless and neat.
- Other industries, like real estate, automotive, and electronics, also benefit. Clean product images grab attention and increase engagement.
Professional clipping path services provide crisp, clear, and high-quality results. It supports companies to present their products and services in a professional way.
Software & Tools Used for Professional Clipping Paths
Photoshop Tools
- Pen Tool – Supports drawing smooth lines around objects. It helps to keep things neat and clean away from each other.
- Anchor Points –Preserve curves and angles to represent shapes.
- Paths Panel – Quickly edit, manage, and organize different paths for faster workflows.
- Layers – Allows you to overlay an original image without changing it. You can change the background or remove the image.
- Selection and Wrapping Tools – Help refine edges and make smooth transitions for a professional look.
- Adjustment Layers – Allows you to adjust colors and color correctly without affecting the original image.
Other tools and plugins are used by experts
- Adobe Illustrator – A vector tool for scalable paths. Great for logos, graphics, and animations.
- GIMP – A free image editor with a path and image selection tool.
- CorelDRAW – Lets you use curves and nodes on vector cut lines to create figures.
- Bezier curve – simplifies shapes in the vector editor and provides better control.
- Automation Plugins – Helps streamline processes and manage complex processes.
- Install third-party plugins – for better integration, style customization, batch editing, and better masking for professional results.
Step-by-Step Guide for Professional Clipping Path Process
Step 1 – Set up your workspace
Organize your files and set up Photoshop. Look at the layers, scale, and color. Once completed, the results will be smooth and quick.
Step 2 – Select the Photoshop Pen Tool.
A pen maker is a basic path maker. Set up anchor points carefully and create smooth paths. Creating a better path saves time and makes you more efficient at cleaning edges.
Step 3 – Draw Clipping Path with Precision
Turn up slowly. Use small points as needed for smooth curves. Make sure the accuracy is maintained to get a perfect outline.
Step 4 – Close and Save the Path
Close the path loop and save it in the Paths Panel. Adjust the settings if necessary. This provides the path ready for masking or isolation without losing details.
Step 5 – Apply path and object segmentation.
Change the path to a selection or split mask from the background. Follow careful workflow to ensure edges are sharp and efficient.
Step 6 – Refine Edges and Retouch
After cutting, clean the surface with a feathering or refinement tool. Adjust colors, shadows, and other details to create a beautiful image.
Step 7 – Quality Check
Zoom in and check out all the shapes, curves, and edges. Make sure everything is in top shape.
Step 8 – Export and send
Save the final photo as a PSD, PNG, or JPG. Enter a correct file name and follow the customer instructions. The image is ready to use for editing.
Common Mistakes to Avoid in Clipping Path
Even experienced designers can make mistakes if they are not careful.
- One of the most common mistakes is using too many anchor points. This can make the path look uneven.
- Another problem is the poor path accuracy. This can leave rough edges or parts of the background behind.
- Inconsistent lighting or shadows during retouching can make the object look flat or unrealistic.
- Data management errors, such as using the wrong file type or using the wrong parts, can decrease the quality and disrupt other processes.
Preventing these errors can lead to cleaner, more accurate images and faster turnaround times.
Tips for controlling Path Accuracy and Workflow Efficiency
- Use the proper pen tool: Place the anchor points where you want them. Focus on good punctuation. Smaller dots make the path clearer and save people time more efficiently.
- Follow the Consistent Workflow: Keep your retouching steps the same every time. Use the same process for edge refinement, masking, and color corrections. A clear workflow makes editing faster and keeps all images consistent.
- Check Quality Regularly: Set up quality checks before delivering images. Check for the cleanness of the lines, the smoothness of the edges, and overall consistency. This confirms that each image is high quality and looks professional.
Why do you need a professional Clipping Path Service?
Manual Precision vs. Automated Tools
Advanced clipping path services provide an accuracy that automated tools cannot match. Experts use the Photoshop Pen Tool to place anchor points in the right place. They help to make simple, accurate paths on complex surfaces such as hair, jewelry, or paper. AI tools can be fast, but they often lose details, create incorrect paths, or struggle with overlapping objects. The designers provide high-quality graphics designed for e-commerce, flyers, or marketing.
The role of a professional Image Editor
An expert provides more than just technical knowledge. They understand how images should look. They manage lighting, shadows, and edge details so the object appears natural. They can fix color, adjust tones, and keep realistic depth. These are things automated tools cannot fully do. Human editors ensure images look professional and appealing, keeping your brand consistent.
Quality Assurance in Every Project
Quality checks are key in professional clipping path work. Editors zoom in to inspect every path, refine edges, and check color accuracy. They ensure backgrounds are even and consistent. Working with multiple images, they will also check the consistency of their images. This advanced quality control ensures that consumers get crisp, clean, ready-to-use images without any additional processing.
Outsourcing costs, lead time, and experience
How much does a standard Clipping Path Service cost?
The price depends on the complexity of the image. Simple images with clean backgrounds cost less. Complex photos with details, many elements, or complex edges require more time and cost. Basic images can cost a few dollars, and high-quality editing can cost a few dollars per image. Affordable services help customers get the best results without spending a lot of money.
How to Compare Price and Quality
Don’t just look at the price. Check samples to see edge precision and path accuracy. Consider how fast the service delivers, how well they communicate, and their revision policies. Even a low-cost service can give excellent results if it follows a proper workflow and maintains quality.
What Makes a Great Clipping Path Company
A top clipping path company combines skill, honesty, and reliable processes. Experienced editors and quality checkers guarantee the best results. Look for companies with clear turnaround times, easy revisions, and a strong portfolio. Their reasonable prices and frequent delivery make them a great company to partner with.
How Clipping Path Adept Can Help You Get Professional Clipping Path Service
Clipping Path Adept is a trusted provider worldwide with over 10 years of experience. Our experienced team provides safe, efficient, and cost-effective solutions for any project. Each image goes through rigorous testing, resulting in high-quality images for e-commerce, portfolios, and promotional materials.
Our prices start at $0.45 per image, and our services are suitable for businesses of all sizes. Customers can try a free trial to see how effective and fast our service is. With 24/7 customer support, we’re here to help.
Customer satisfaction is our top priority. We’ve received rave reviews for our attention to detail, quick turnaround, and experience. Customers all over the world rely on Clipping Path Adept for high-quality image editing that meets their needs.
Conclusion
A professional clipping path service keeps the image clean, transparent, and ready for any use. Whether you’re a photographer, an e-commerce store, or an advertiser, a professional service will help you stay consistent and accurate. Successful editors follow a well-defined set of rules and processes behind the scenes. This creates flawless visuals that help your products and content stand out. Outsourcing to a trusted clipping path company like Clipping Path Adept saves time, improves efficiency, and guarantees high-quality results for every image.
Take the first step toward perfect images. Try our professional clipping path service today and get clean, studio-quality visuals!
FAQ
What is a clipping path?
The clipping path is a closed line drawn around an object in an image. This separates the surface from the background. This makes it easy to remove, replace, or reverse without having to move things around.
What is the main requirement for a clipping path?
The key requirement is precision. The anchor should be in a safe place and easy to retrieve. A skilled designer and the right software are essential for successful results.
Which software do we use for clipping paths?
The most popular software is Adobe Photoshop, which uses the Pen tool and the Paths panel. Other tools include Adobe Illustrator, GIMP, CorelDRAW, and faster plugins.
Can I pay someone to edit photos for me?
Yes! Professional editors can handle clipping paths and other photo editing tasks. Outsourcing saves time, ensures quality, and keeps results consistent across many images.
What is the usage of a clipping path?
This is used in e-commerce, advertising, graphic design, and marketing. They help make transparent product images, isolate objects, remove backgrounds, and make visuals look more appealing for websites, catalogs, or ads.